| DESIGN THREE Mask Design: An
Expressive Mask form created from the side
of a cardboard box.. You will use an
antiquing paint method with acrylic and decorate the mask using
materials or appliqué. 3D DESIGN No. 3 Mask
Design - - 9 days to make.
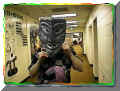
The Mask is the original magic image. When
we wear a mask we assume the personality and attributes of the image of
the mask. African, aboriginal and Native American masks were used
in connection with magic spirit rituals and employed
supernatural powers to control the outcome of events in life, create
fertility, bring prosperity, good harvest, or to act to destroy an
enemy of the tribe or clan. We will not use these masks for evil or
malevolent purposes but to serve a bold and expressive images to
possibly give form to alter egos, ( the image of our unconscious
selves.) The concept of "Persona" comes from the mask.
The "personality" is the mask identity we project to the world in our
everyday life and relationships.
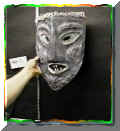
Construction:
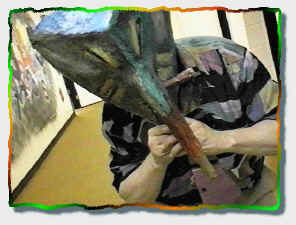
1. The supporting shape comes from the
corner of a corrugated cardboard box:.
2. The structure of features like the
eyebrows, nose, wrinkles, or hair, is built up using "bunched up"
slightly- moist, toweling. These masses and contours can be taped in
place until the glue tissue layers make them secure.
3. The final "skin" of tissue paper or
napkin paper is layered over it. This skin of paper Mache' must
be handled carefully to make a seamless smooth skin. Three or four
layers will make it rock hard.
4. The adhesive is white school glue
(elmer's glue type) mixed about 50/50. Toilet paper can be used
for the final surface but where more bulk is needed, use semii moist,
paper toweling to build the form.
Finishing treatment is open to your
imagination.
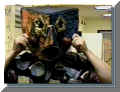
Applied decoration
with surface textures offer rich possibilities. Such textures made from natural materials like sea shells
were popular with native mask makers. Any material can be used for
ornament, e.g. buttons, beads, rope, chording, macaroni, etc. etc.
Painted effects.
Make sure the paint or pattern does not detract from the structure.
Transparencies and antique effects are more subtle than bright paint
effects. There are two ways of making an
antique look. 1. Use a transparent dark wash (acrylic) over a base coat
which is a light color. or 2. Use a lightly rubbed on light color over
a base coat which is a dark color. (any dark color or black). Here is
where metallics are very effective. Caution: apply very, very lightly,
use fingers.
Fabric or
fiber to suggest hair or decoration: Raffia, cord, string, yarns. To connect use a well crafted
design system, such as knotted yarn drawn through holes.
Some masks used by native
people:
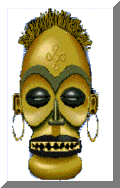
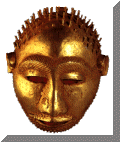
(The methods are different than ours.)
|