Clay Seven - Sample
Demo
More Clay Design Ideas
View
finished Middle School Assembled Clay Projects
Clay Seven - Sample
Demo
More Clay Design Ideas
View
finished Middle School Assembled Clay Projects
|
Introduction to Clay. 7th Grade Clay Design is popular because
of the physical connection of the hands to the clay. The personality
of clay makes it a "direct medium." This means that any action
of the hand or tool makes a lasting mark. In the direct medium
concept, each movement or gesture of the hands is frozen in time, sort
of like a dinosaur's footprint. Because of this directness of
clay, it shows skill to use a minimum of handling to produce the
desired design. Overworked clay is a negative. 1.) Preparing the clay: Adding or removing moisture so that it is uniformly soft and pliable enough but not too wet and sticky. Moistening too dry clay is done by adding drops of water between clay slices and then rolling and folding (wedging). Drying clay that is too wet, in a similar way can be rolled and folded until it is no longer tacky and sticky. Pressing the clay onto a fabric surface. Canvas or thick fabric is good for absorbing moisture; Paper or cardboard are very absorbent also. 2.) Hand building with slabs or pieces of clay. Clay building is a versatile and 'artistic' method of producing ceramic designs (pottery). With slab building one can make sculpture, containers and a variety of other interesting and easy ceramic designs. The slabs must not be too thin or too thick. About a half inch is good. Rolling pins or roller tools can be used to produce slabs. Make sure they are of uniform thickness. Slab pieces can be assembled many ways. You will be shown some options. 3.) Decorating slabs of clay. The slabs are decorated before they are joined or assembled. A variety of beautiful surface treatments make slabs beautiful. Here are some: Scraping; Scratching or drawing; Stamping a pattern using simple stamps; Tearing clay slabs into pieces and applying these to make design (appliqué') and extruding liquefied clay to make lines or designs (like draw with a Ketchup bottle.) 4.) Good Clay design: The weakest part of any typical school clay projectsis that little or no attention is given to the treatment of clay surfaces. There are many, many effects which are possible, suggested by the list of treatments described in no. 3 above, it is just a matter of giving some thought to not just the structure but the detail upon the structure. Remember the concept of primary and secondary breakup?! Once you begin to handle clay it is best to know exactly what you want to do with it. Not to have a plan is to merely handle and manipulate the clay without purpose and it becomes "overworked" and poorly controlled. Some Don'ts or "No-No's" Please Pay Close Attention: Clay "Warm up" & Demo:
Be sure to repeat _ make a series
of each texture effect. Basic Instructions - -
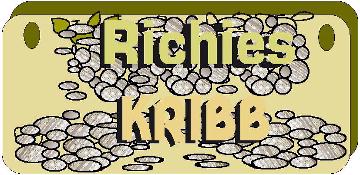
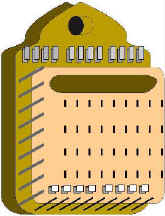
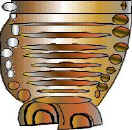
Project 2: Pocket Wall Plaque (Grade 7) This is an easy to do clay project. This project features 'slab building' and textured design made by stamping, appliqué', and incising line textures. This project is made of two slabs of clay. One for the shape and one for the pocket. It can be made very quickly, a half hour or less and is quite attractive. The more attention given to pattern on the surface the better your design will be. Here
are the steps to complete the project:
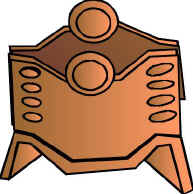
GRADE 8 HAND BUILT PROJECTS
Slab
construction is a fast and very "Artsy"
approach to clay design. Hand built pottery
is crafted with a minimum amount of effort and
handling and does not take the hours and
hours of practice to gain the skills that wheel
pottery requires for only the basic forms.
Slabs about .5 inch, can be rolled out, cut
to shape then decorated with patterns made
by stamps, applicque or incising and
finally cutting out the clay sections and
assembling them carefully. Slabs are joined with
some liquefied clay (slip) which serves as the
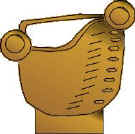
glue. PARTS OF THE CLAY VESSEL FOOT Second,
an aesthetic reason.
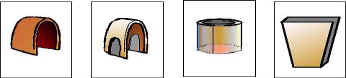
Clay Project Designs 1 This design is a single slab folded and sealed on one side Add foot and possible handles to set off the top
2. 2 slabs are pressed to join at edges with fingers or tools. Repeat appliqué textures. added before joining. Handles optional clean lines top by adding a belt to top Foot #2
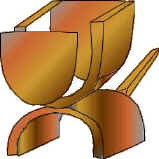
4 This design is formed
by bending two slabs into "U"s. Join in the center;
5
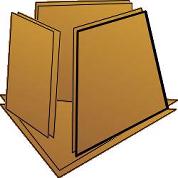
Several upright slabs are joined to a matching
base. A triangle base would have 3 uprights. etc.
- Upright pieces can also be bent outward to make
a very interesting look. Secure touching edges
with slip. Join to Base with slip.
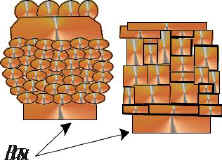
6 Use small clay chips or fragments to construct a total design. these pieces are added onto each until the desired height is reached. A simple base such as an oval or another symmetrical shape will work the best
Leap
into clay
|